Add Adobe Fonts
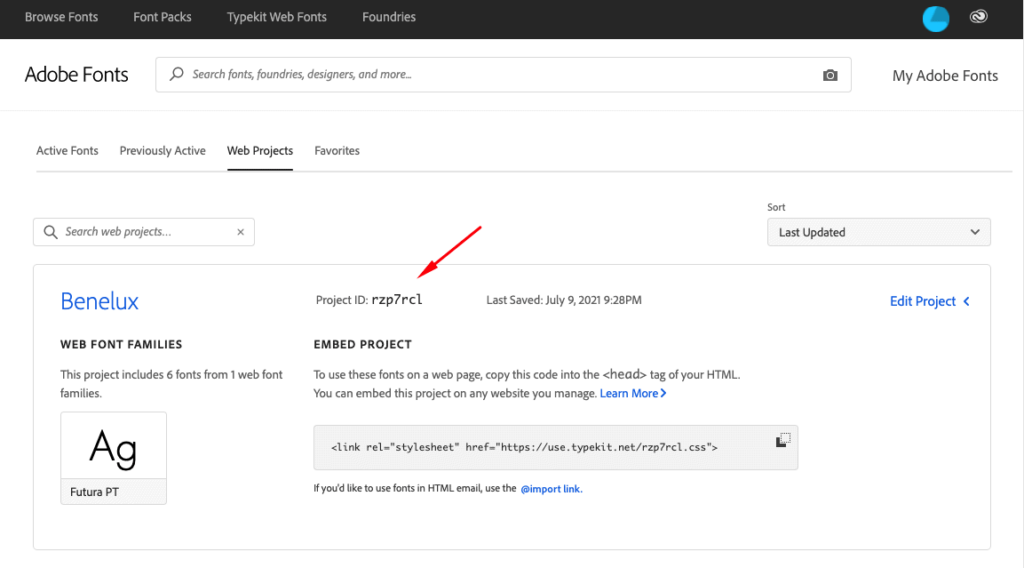
1. Create a web project on Adobe Fonts website, and get the Project ID.
2. Go to Lifeshine > Fonts page and enter the Project ID in Adobe Fonts box and click Sync Project.

3. Go to one of the typography settings and check if Adobe Fonts shows up in the font dropdown list.
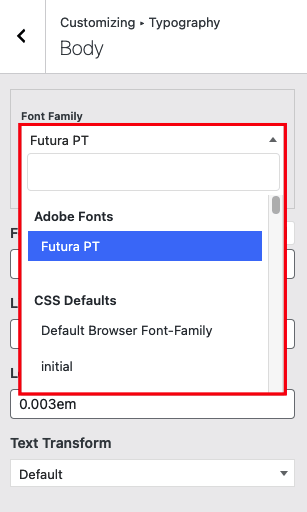
If your project is synced successfully, your fonts will appear in the Adobe Fonts box and it’ll also be available to choose in Font settings in Customizer screen.
Delete Adobe Fonts
To delete an existing font project, simply click the Remove Project button next to Sync Project button.